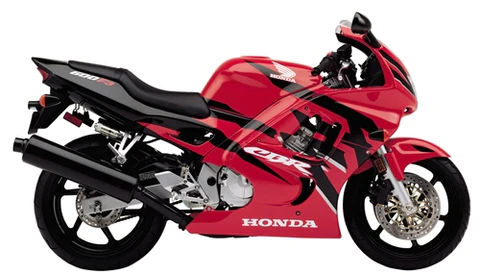
Stopping on a Dime: DIY Brake Pad Replacement on Your 1998 Honda CBR600F
Taming the beast that is a 1998 Honda CBR600F requires respect, precision, and most importantly, reliable brakes. Worn-out brake pads can turn that exhilarating ride into a heart-stopping near miss, so keeping them fresh is crucial. Luckily, replacing the pads on your '98 CBR600F is a manageable DIY project even for the mechanically-inclined novice.
Before you start:
- Gather your tools: Socket wrench set, Allen key set, brake fluid reservoir clamp, C-clamp (optional), brake cleaner, and of course, new brake pads for your specific model year.
- Safety first: Secure your bike on a stand or lift for easy access and stability. Wear gloves and safety glasses throughout the process.
- Consult your manual: While this guide gives a general overview, the Honda service manual provides specific torque specifications and procedures unique to your model.
Getting to work:
- Pump the brake lever: This pushes the pistons back into the caliper, creating space for the new pads. Be mindful of the brake fluid level in the reservoir, as it might overflow due to the piston movement.
- Remove the caliper bolts: Two bolts hold the caliper to the fork. Unscrew them carefully and support the caliper with a bungee cord or strap to avoid stressing the brake line.
- Extract the old pads: Slide the old pads out of the caliper brackets. Inspect them for uneven wear or contamination. If the disc rotors look worn or glazed, consider replacing them as well.
- Clean the caliper and brackets: Use brake cleaner to remove any dirt, debris, or old pad material that could compromise the new pads' performance.
- Install the new pads: Slide the new pads into the brackets, ensuring they align properly with the disc rotors. Some pads might have wear indicators; make sure they haven't reached the end of their life.
- Reattach the caliper: Align the caliper with the fork and screw the bolts back in, following the torque specifications in your manual. Don't overtighten!
- Pump the brake lever again: This pushes the pistons back out and engages the new pads with the rotors. Check for any leaks or binding in the caliper movement.
- Bleed the brakes: This removes air bubbles that can affect braking performance. Use a proper bleeding kit and follow the specific instructions for your CBR600F model.
- Final checks: Top up the brake fluid reservoir (if needed) to the correct level. Test the brakes gently at low speeds before hitting the open road.
Tips for success:
- Work in a clean, well-lit environment.
- Have a container ready to catch any brake fluid spillage.
- Don't reuse old brake pads.
- If you're unsure about any step, consult a mechanic or refer to your manual.
The satisfaction of stopping on a dime with your own two hands is hard to beat. By following these steps and exercising caution, you can tackle your 1998 Honda CBR600F brake pad replacement and keep your trusty steed safely at a standstill.
Bonus: Check out YouTube for specific video tutorials on CBR600F brake pad replacement. Visual demonstrations can be a great aid for visual learners.
Remember, regular maintenance is key to a long and healthy life for your CBR600F. Stay safe, ride responsibly, and enjoy the open road!


